Why mutators define progression
Most tactics RPGs grow characters through skill trees and fixed class paths. Urtuk: The Desolation throws that out and builds progression around mutators — powers you extract from the enemies you defeat and graft onto your own survivors. This single design choice is what makes Urtuk's party-building feel so personal: two players running the same classes can end up with completely different bands depending on which mutators they harvested and how they assigned them. It also fits the grim, scavenger tone of the world perfectly — you are quite literally cobbling your fighters together from the remains of what you have killed.
But mutators are not free power. Almost every one costs maximum health, so the system is really an ongoing negotiation between strength and survivability. Understanding that trade-off, and how to manage it, is the key to building a band that is both powerful and durable enough to survive Urtuk's attrition.
Mutators sit alongside ordinary level-ups (which raise four base stats) and traits (which unlock from repeated actions). Mutators are the part you control most directly, which is why they are the heart of build-crafting in Urtuk.
How extraction works
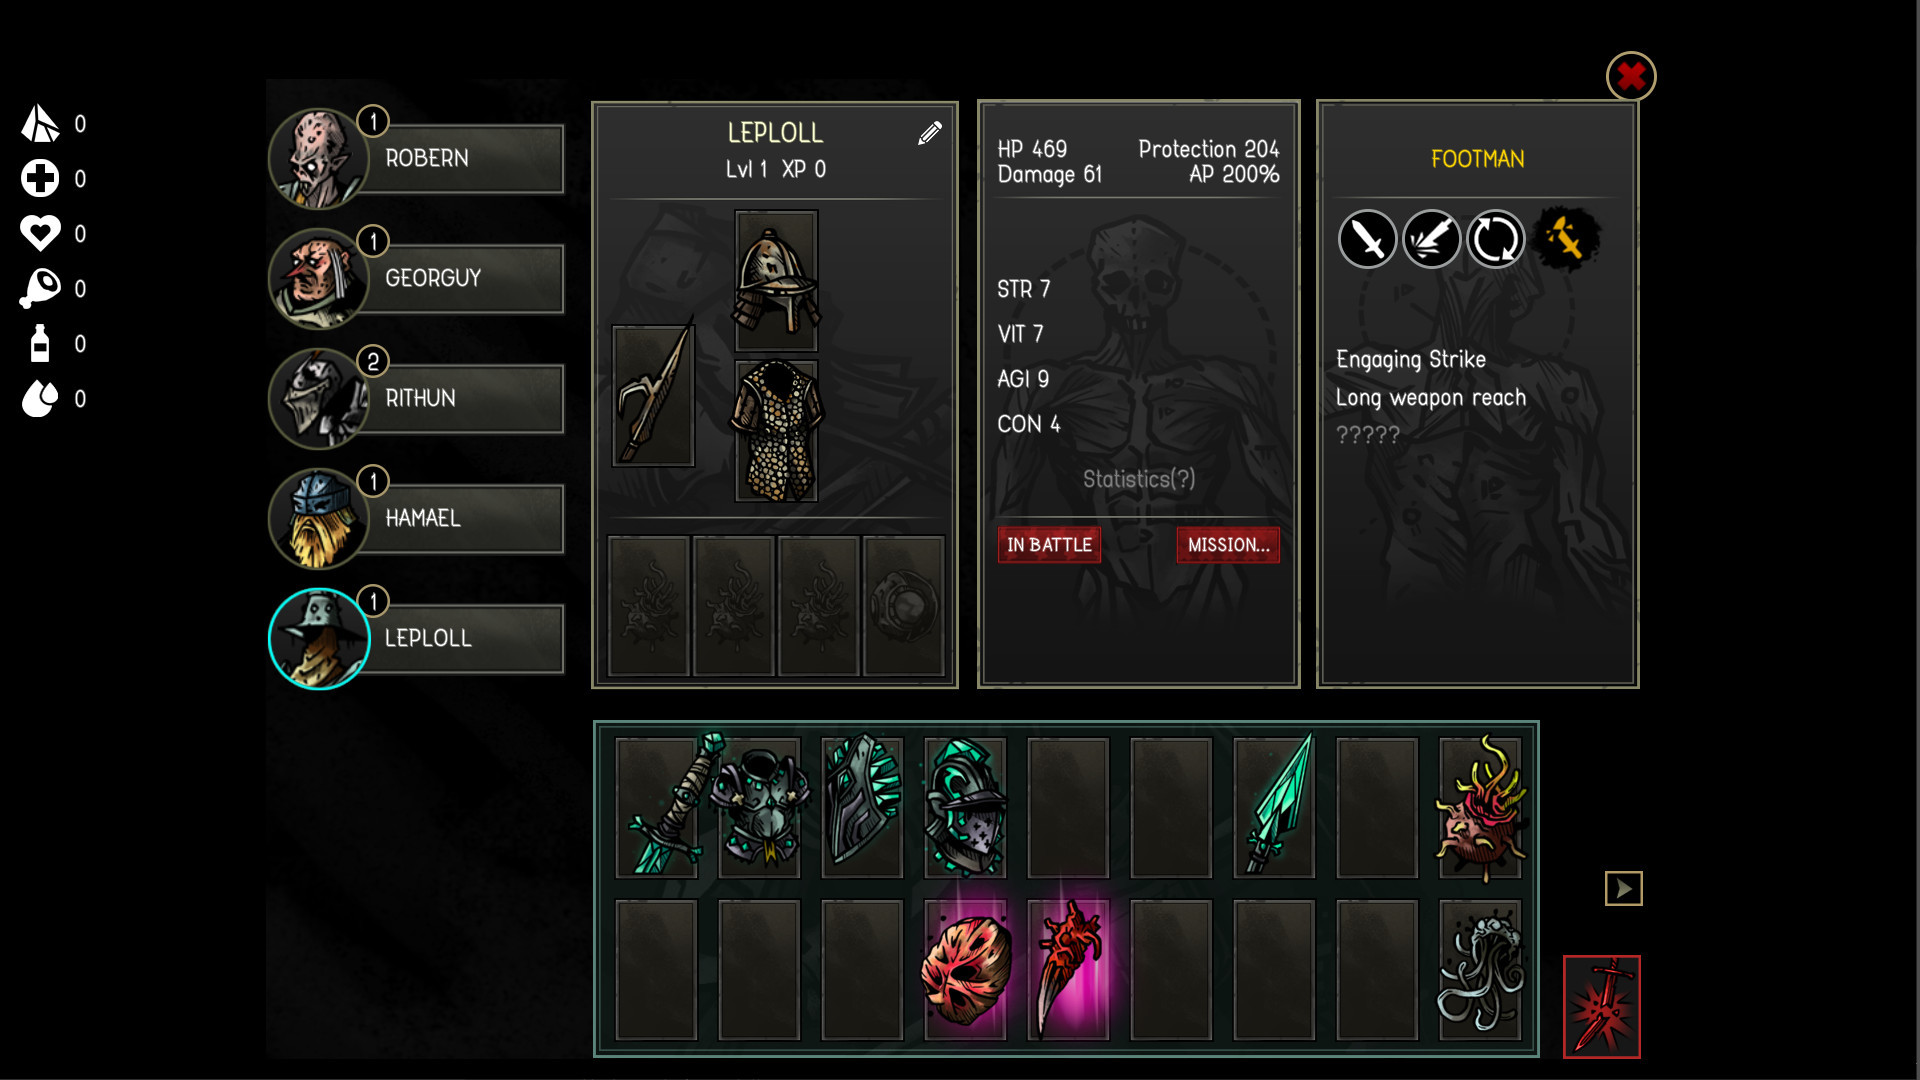
You acquire mutators by defeating enemies, particularly the tougher monstrosities that carry the more interesting powers. Once harvested, a mutator can be assigned to a character to grant its effect — these range from offensive boosts and passives to status effects like acid. The catch is the cost: most mutators reduce the recipient's maximum health. That makes every assignment a real decision rather than an automatic upgrade. A mutator that adds serious damage but shaves off a chunk of health might be perfect on a sturdy front-liner and disastrous on an already-fragile attacker.
Because of this, treat maximum health as a budget you spend on power. Before assigning a mutator, ask whether that character can afford the durability loss given their role and position in your formation. The strongest builds are the ones that get a lot of power onto units that can absorb the cost.
Harvest aggressively but assign carefully. There is no harm in collecting mutators from every tough kill; the skill is in deciding which ones go on which survivors, and which are not worth the health they cost on anyone in your current band.
Affinity: buying back the penalty
The maximum-health cost is not permanent in effect. Keep a mutator equipped on the same character long enough and they develop an affinity for it, which gradually reduces the health penalty it imposes. This quietly rewards commitment over constant swapping: a mutator that felt expensive when you first added it becomes more affordable the longer that fighter lives with it, so a stable, long-serving survivor can eventually carry powers that would cripple a fresh recruit. It is one more reason to keep your developed fighters alive — they are not just leveled, they are adapted.
The practical lesson is to decide on a character's core mutators relatively early and stick with them, letting affinity work in your favour, rather than churning mutators every battle and never reaping the discount.
Traits versus mutators
It helps to keep the two progression layers straight. Mutators are deliberate: you harvest them from enemies and choose where to assign them, paying health for power. Traits are passive: they unlock by repeating specific battle actions — performing the same kind of action enough times (for example, getting kills or supporting allies) activates a bonus tied to how that character actually fights. In other words, mutators are the build you design, and traits are the reputation a character earns through play. Both make your survivors more individual over a campaign, but only mutators are something you actively spend resources and health to control.
| System | How you get it | Cost | Best use |
|---|---|---|---|
| Mutators | Extract from defeated enemies | Usually maximum health | Deliberate build power on durable units |
| Affinity | Keep a mutator equipped over time | None — it reduces the penalty | Rewards committing to a build |
| Traits | Repeat specific battle actions | None — passive unlock | Bonuses matched to how a unit fights |
| Level-ups | Gain experience | None | Raising four base stats |
Building without breaking your band
The golden rule is to match mutator load to durability. Tanks like the Guardian and sustain units can absorb the maximum-health cost of strong mutators, so they are your best homes for the heaviest, most powerful ones. Fragile damage dealers should stay leaner — a few well-chosen mutators rather than a tower of them — because a glass cannon is exactly the kind of unit permadeath claims after one bad turn. Use affinity to slowly recover the penalty on your committed builds, and reassess as your band grows: a mutator that was too costly early may fit a now-veteran fighter who has adapted and leveled.
Above all, never sacrifice so much health for power that a survivor cannot take a hit, because losing a heavily invested fighter is the worst setback in the game. Build for durable strength, not fragile spikes. Pair smart mutator choices with a balanced roster from our classes tier list and the tactics in the combat guide; if you are still learning the basics, the beginner guide lays the groundwork.
A mutator that drops a fragile unit's health too low is a trap, not an upgrade. If a power would leave a survivor unable to survive a single solid hit, it belongs on a tank instead — or not in your band at all yet.