Hollow Knight drops you into a huge underground kingdom with almost no instructions. Most early frustration comes not from hard enemies but from rules the game never spells out: the map you bought does not fill in, your Geo vanishes when you die, a heal in front of an enemy does nothing.
This guide starts with the answer to "what should I actually do first?", then explains each rule behind it. Names follow our Charm Guide and Boss Guide, which go deeper on those two topics.
What to do in your first hours
Do these roughly in this order. None of them needs advanced skill, and together they remove most of the early confusion.
| What to do | Where | Why it matters | Cost |
|---|---|---|---|
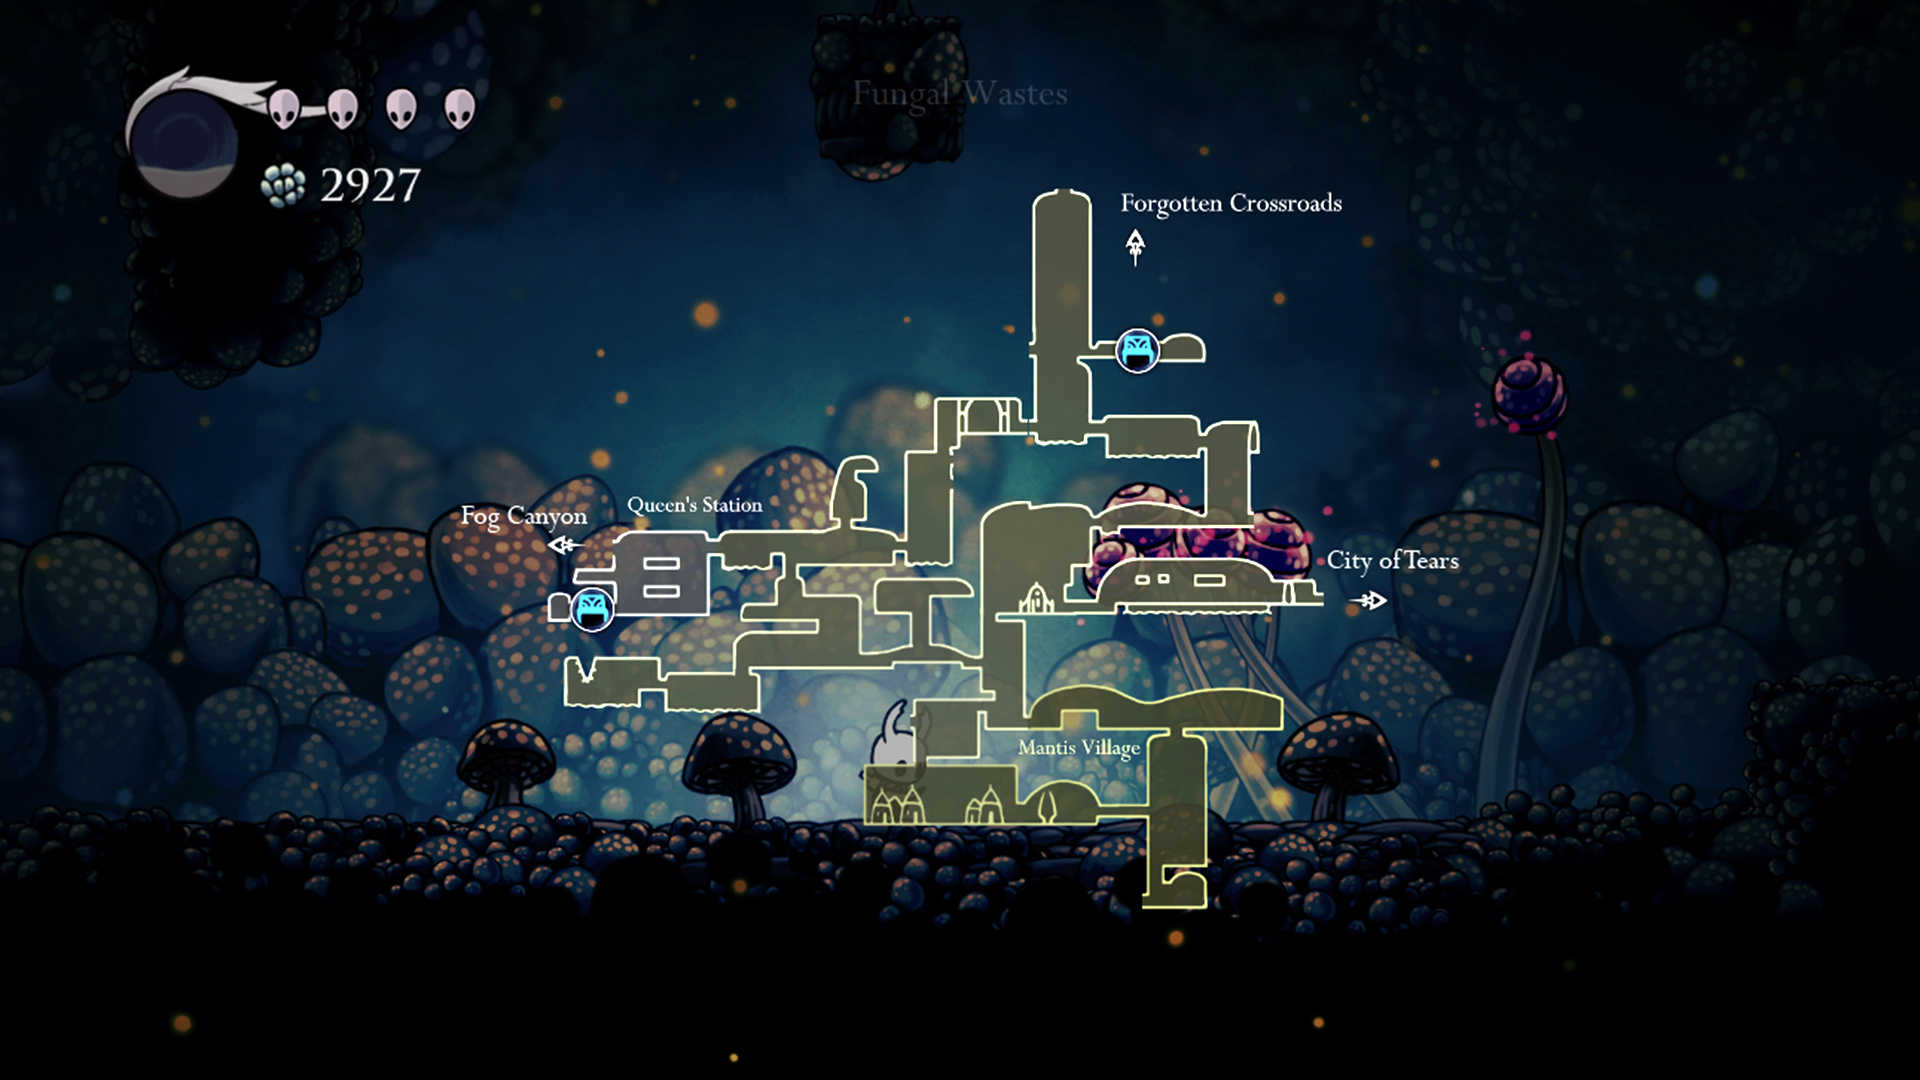
| Buy the area map from Cornifer | Each area; follow the scattered paper and humming | Without it you have no map of the area | 30 Geo in the Forgotten Crossroads |
| Buy the Quill from Iselda | Her map shop in Dirtmouth, next to the Stag Station | The map only fills in with what you explore if you own the Quill | 120 Geo |
| Rest at every bench you find | Throughout Hallownest | Benches set your respawn point, heal you fully, update the map and are where you change charms | Free (a few charge a toll) |
| Get Vengeful Spirit and Soul Catcher | Ancestral Mound, west part of the Crossroads | The spell kills the Elder Baldur blocking Greenpath; Soul Catcher gives more SOUL per hit | Free |
| Beat Hornet for the Mothwing Cloak | Greenpath | The dash opens the Fungal Wastes and much more | Free |
| Recover your Shade after every death | Where you died | It holds all the Geo you lost and the missing part of your SOUL meter | Free, if you survive the trip |
| Buy the Wayward Compass | Iselda | Shows where you are on the map; the biggest help while learning the layout | 220 Geo, 1 notch |
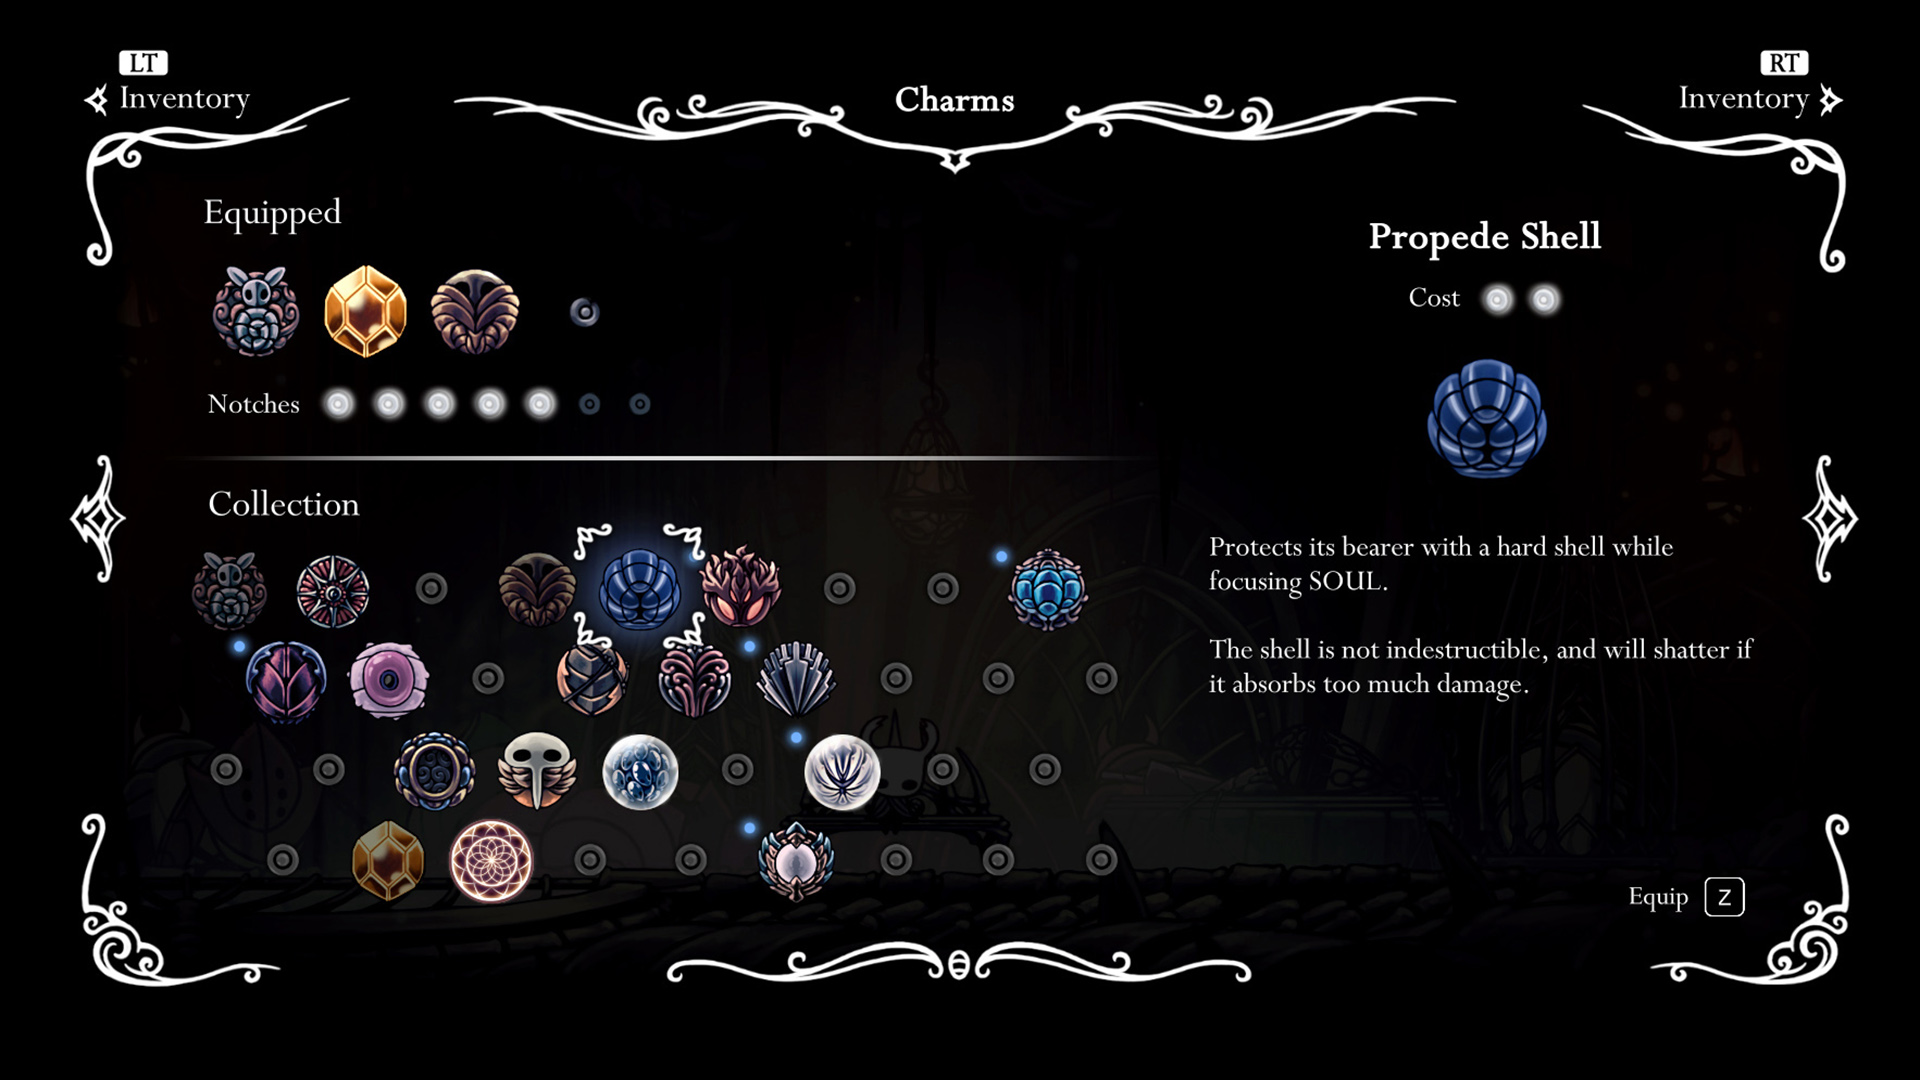
| Buy your first combat charm | Salubra, at the bottom of the Crossroads | Shaman Stone (220) or Longnail (300), then Quick Focus (800) | 220–800 Geo |
Iselda's shop opens after you listen to Cornifer in the Crossroads (or after False Knight is defeated). If Cornifer has already left an area, his map is sold by Iselda instead, for a little more.
Controls and combat basics
Nail and SOUL
Your weapon is the nail. Every nail hit on an enemy gives you 11 SOUL, the white liquid in the round meter at the top left. SOUL is the fuel for both healing and spells. The meter holds 99, which is three uses. This is why hitting enemies is how you heal: there are no healing items to buy.
Some things give no SOUL even when you hit them, such as False Knight's armour. If the meter is not filling, you are hitting the wrong part.
Focus: healing with SOUL
Hold the Focus button to turn 33 SOUL into one mask of health. The first mask takes a little over a second (about 1.1 s); if you keep holding, each further mask takes about 0.9 s. Three rules follow:
- You cannot move while focusing. Heal only when the enemy is far away or busy.
- If you are hit mid-Focus, the SOUL is wasted. A failed heal is worse than not healing.
- Focusing at full health still spends SOUL. Do not tap it out of habit.
Quick Focus (800 Geo from Salubra) makes Focus 33% faster and is the most useful charm for players still learning fights.
Pogo: bouncing off spikes and enemies
Attack downward while in the air and your nail bounces you off whatever it hits: enemies, spikes, thorns and some objects. This "pogo" is how you cross spike floors safely, and it is required early: in the Fungal Wastes, purple mushrooms bounce you higher than normal, and you must use them to reach Mantis Village before you have the Mantis Claw. A bounce also refreshes your dash and, later, your double jump.
Invulnerability frames
After you take a hit, you are invulnerable for about 1.3 seconds. Use it to walk out of a bad spot rather than panicking. The Stalwart Shell charm (200 Geo from Sly) extends it. Later, Desolate Dive makes you invulnerable for about 0.4 seconds during and just after the dive, so you can use it to pass through some attacks.
Geo and the Shade: what you lose when you die
Geo is the currency for everything: maps, charms, nail upgrades, Stag Stations and some bench tolls. Dying is where new players lose most of it.
| When you die | What happens |
|---|---|
| Respawn | At the last bench you rested on, not where you died |
| Geo | All of it is dropped and held by your Shade |
| SOUL meter | Capped at 66 of 99 until the Shade is killed (two heals instead of three) |
| Your Shade | Appears in the room where you died or the one before it, and fights with your nail and your spells |
| Die again first | A new Shade appears at the new spot; the old Shade and its Geo are lost for good |
| Died to a boss | The Shade usually appears in a safe spot outside the arena, so you can reach it without restarting the fight |
-
1
Go straight back
The Shade's position is marked on your map. Do not explore new rooms on the way; that is how the second death happens.
-
2
Bait it out
If it is in an awkward place, hit it from a distance with Vengeful Spirit to draw it toward you.
-
3
Kill it
Its health is half your maximum masks (rounded down) times your nail damage, so with 5 masks it dies to two nail hits. Later, one hit of the Dream Nail kills it instantly.
-
4
Use Jiji if it is stuck
Confessor Jiji, in the cave east of Dirtmouth behind a Simple Key door, summons your Shade for a Rancid Egg (60 Geo from Sly).
Spend Geo before you go somewhere risky. Holding 1,000 Geo while exploring a new area is how you lose it twice. Buy the map, the charm or the nail upgrade first.
Maps, Cornifer, Iselda and Stag Stations
Cornifer is in most major areas (not the Resting Grounds, the Abyss or the Hive). You can hear his humming from a few rooms away. He leaves once you have progressed far enough in the area, usually after its boss, and his map then goes on sale in Dirtmouth.
Iselda runs the map shop in Dirtmouth. She sells the Quill, the Wayward Compass, area maps you missed and map pins, including the Bench Pin and Stag Station Pin (100 Geo each) that mark those locations.
| Area map | From Cornifer | From Iselda |
|---|---|---|
| Forgotten Crossroads | 30 Geo | 40 Geo |
| Greenpath | 60 Geo | 80 Geo |
| Fungal Wastes | 75 Geo | 100 Geo |
| City of Tears | 90 Geo | 120 Geo |
The Wayward Compass charm shows your position on the map. It costs 1 notch, so it is cheap to wear while you learn the layout; swap it out later for combat charms.
Stag Stations are fast travel. Pay the toll once, then hit the bell to call the Last Stag. The Forgotten Crossroads station costs 50 Geo, and opening any station also lets you open the one in Dirtmouth from inside. Others early on: Greenpath 140 Geo, Queen's Station (Fungal Wastes) 120 Geo, City Storerooms 200 Geo and King's Station 300 Geo, both in the City of Tears.
Benches, besides saving and healing, refill Soul Totems and respawn the enemies you killed elsewhere. Hot springs restore your masks too.
The early route and where the movement abilities are
Hollow Knight is open, but the early part has a natural order because each area needs an ability from the one before. This table lists the key abilities in the order most players find them.
| Ability | Where | What you need first | What it opens |
|---|---|---|---|
| Vengeful Spirit (spell) | Ancestral Mound, Forgotten Crossroads (from the Snail Shaman) | Nothing | Kill the Elder Baldur that blocks Greenpath |
| Mothwing Cloak (dash) | Greenpath, after beating Hornet | Vengeful Spirit to enter Greenpath | The Fungal Wastes, Salubra's shop, wider gaps |
| Mantis Claw (wall jump) | Mantis Village, Fungal Wastes | The Cloak; bounce on purple mushrooms to get there | The City of Tears gate area, Howling Cliffs, most vertical shafts |
| City Crest (key item) | Dropped by False Knight, Forgotten Crossroads | Nothing | The gate from the Fungal Wastes into the City of Tears (the gate area needs the Claw) |
| Desolate Dive (spell) | Soul Sanctum, City of Tears, after Soul Master | The City of Tears | Breakable floors, including one way into Crystal Peak |
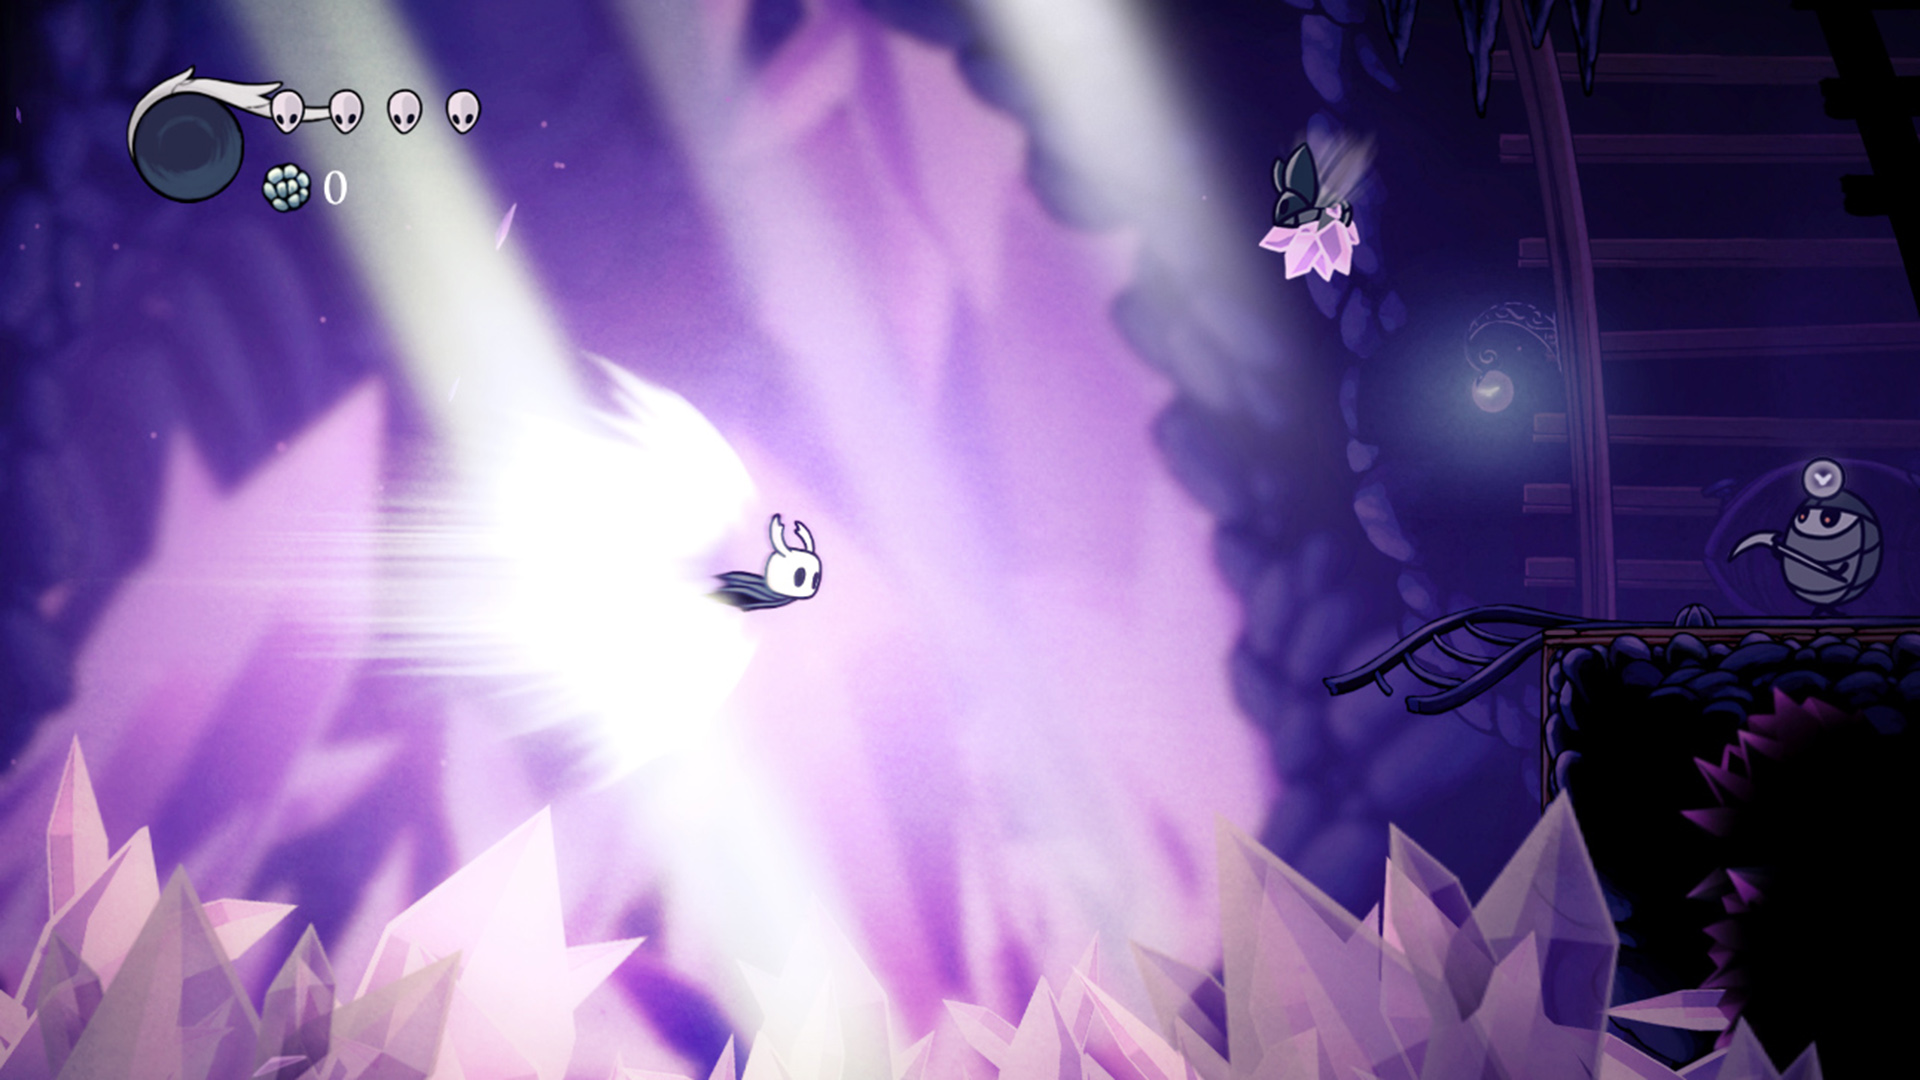
| Crystal Heart (super dash) | Crystal Peak, inside an old mining golem | The Claw; enter through a Dive floor, or a 50 Geo toll gate that needs the Lumafly Lantern | Long horizontal gaps; needed to reach Isma's Grove |
| Monarch Wings (double jump) | Ancient Basin, past Broken Vessel | The lift shaft down from the City of Tears | Not strictly required, but opens the Palace Grounds and makes many areas easier |
| Isma's Tear (swim in acid) | Isma's Grove, Royal Waterways | Crystal Heart and beating Dung Defender; the Waterways hatch needs a Simple Key | Acid pools, including routes into Fog Canyon and the Queen's Gardens |
| Shade Cloak (dash through attacks) | The Abyss | The King's Brand to open the Abyss (late game) | Shade Gates; dashing through enemies |
The Dream Nail comes from the Resting Grounds, by inspecting the memorial to the Dreamers. It is part of the main story rather than movement, and it also kills your Shade in one hit.
-
1
1. Dirtmouth and the Forgotten Crossroads
Go down the well. Buy Cornifer's map (30 Geo), then the Quill from Iselda. In the west, the Ancestral Mound gives Vengeful Spirit and, after its Elder Baldur, the Soul Catcher charm. False Knight in the centre drops the City Crest.
-
2
2. Greenpath
Use Vengeful Spirit on the Elder Baldur at the entrance. Buy the map (60 Geo), open the Stag Station if you can afford it, and beat Hornet for the Mothwing Cloak.
-
3
3. Back to the Crossroads
Beat Gruz Mother, rescue Sly in the abandoned village at the bottom (he reopens his shop in Dirtmouth), and visit Salubra, whose shop needs Gruz Mother beaten and the dash. Buy your first charm and, once you own 5 charms, a notch (120 Geo).
-
4
4. Fungal Wastes and Mantis Village
Enter from the south-west of the Crossroads near the hot spring with the dash. Bounce on the purple mushrooms down to Mantis Village and take the Mantis Claw. The Mantis Lords below are optional; come back after a nail upgrade.
-
5
5. City of Tears
Insert the City Crest in the statue at the gate (reachable with the Claw). Upgrade your nail at the Nailsmith (250 Geo), then take Desolate Dive from Soul Master in the Soul Sanctum.
-
6
6. Branch out
From here the order is yours: Crystal Peak for the Crystal Heart, the Ancient Basin for the Monarch Wings, the Royal Waterways for Isma's Tear. The Exploration Guide covers this part.
If a path needs something you do not have — acid you cannot swim, a wall you cannot climb, a floor that looks breakable — it is almost always an ability gate, not a puzzle. Mark it and go elsewhere.
Nail upgrades, Mask Shards and Vessel Fragments
Nail upgrades
The Nailsmith lives in a hut on the outskirts of the City of Tears. Nail damage is the single biggest stat increase in the game.
| Nail | Cost | Damage |
|---|---|---|
| Old Nail | Starting weapon | 5 |
| Sharpened Nail | 250 Geo | 9 |
| Channelled Nail | 800 Geo + 1 Pale Ore | 13 |
| Coiled Nail | 2,000 Geo + 2 Pale Ore | 17 |
| Pure Nail | 4,000 Geo + 3 Pale Ore | 21 |
There are exactly 6 Pale Ore: in the Ancient Basin (guarded by two Lesser Mawleks), from the Seer for 300 Essence, at Hallownest's Crown at the top of Crystal Peak, past Nosk in Deepnest, from the Grubfather for 31 grubs, and from the Trial of the Conqueror at the Colosseum of Fools. None of them is in the opening areas, so the 250 Geo upgrade is the one to do early.
Mask Shards
You start with 5 masks. Four Mask Shards make a new mask, and the 16 shards in the game raise you to 9. The ones you can get early:
- Sly in Dirtmouth sells two for 150 and 500 Geo once you have rescued him (two more need the Shopkeeper's Key).
- The Grubfather in Grubhome (north-west Crossroads) gives one for rescuing 5 grubs.
- Brooding Mawlek, behind a breakable wall in the far west of the Crossroads, drops one (Mantis Claw recommended).
- Bretta's house in Dirtmouth has one after you rescue Bretta from the Fungal Wastes.
- Forgotten Crossroads, south of False Knight where the Goams are, and Queen's Station, both once you have the Mantis Claw.
Vessel Fragments
Three Vessel Fragments make a Soul Vessel, which stores 33 extra SOUL that refills your main meter automatically; nine fragments give three vessels. Early ones: Sly sells one for 550 Geo, one sits in Greenpath near the still-closed entrance to the Queen's Gardens, and one is above King's Station in the City of Tears.
Early bosses in one line each
| Boss | Where | In one line |
|---|---|---|
| False Knight | Forgotten Crossroads | Hit the maggot's head when it falls out, not the armour; drops the City Crest |
| Gruz Mother | Forgotten Crossroads, asleep in a church | Easy practice; must be beaten before you can reach Salubra |
| Brooding Mawlek | Far west of the Crossroads, behind a breakable wall | Optional; drops a Mask Shard |
| Hornet | Greenpath | Heal during her needle throw or thread storm; drops the Mothwing Cloak |
| Vengefly King, Massive Moss Charger | Greenpath | Optional and short |
| Mantis Lords | Mantis Village | Optional; do them after a nail upgrade for Mark of Pride |
| Soul Master | Soul Sanctum, City of Tears | Watch for the fake-out slam; drops Desolate Dive |
Attacks, heal windows and charm setups for each are in the Boss Guide.
Which early charms to use
You start with 3 notches. A good first setup is Soul Catcher (free, Ancestral Mound) plus the Wayward Compass while you learn the map. From Salubra, buy Shaman Stone (220 Geo) if Vengeful Spirit does your damage or Longnail (300 Geo) if you prefer the nail, then Quick Focus (800 Geo). Her first extra notch costs 120 Geo once you own 5 charms; cheap Steady Body (120 Geo) counts toward that. The Charm Guide has a loadout for every notch count.
Common mistakes
- Buying a map but not the Quill. The map stays as Cornifer drew it until you own the Quill and rest at a bench.
- Dying twice in a row with a lot of Geo. Go straight back to the Shade, and spend Geo before risky trips.
- Healing in front of an enemy. A Focus interrupted by a hit costs the SOUL and gives nothing.
- Hitting armour for SOUL. False Knight's armour gives none; wait for the head.
- Thinking the Mantis Lords guard the Mantis Claw. The claw is in the village above them; the Lords are optional.
- Skipping the first nail upgrade. 250 Geo almost doubles your damage (5 to 9). Do it the first time you reach the City of Tears.
Once the early route is done, the Exploration Guide covers where to go next, the Boss Guide the fights, and the Charm Guide your build. For whether the game is for you, see the Hollow Knight Review.
★Honest Take: the first hours are the hardest part to read
Hollow Knight's opening is its least friendly stretch: 5 masks, a weak nail, no map, and a death system that punishes exploring with money in your pocket. Players who quit in the Forgotten Crossroads usually lack information rather than skill — no Quill, no idea where the Shade went, healing next to an enemy. Once you have the map, the dash and your first nail upgrade, the game becomes far more generous. Getting lost is part of the design and often rewarding, but it is fine to use a guide for the basics and keep the discoveries for yourself.