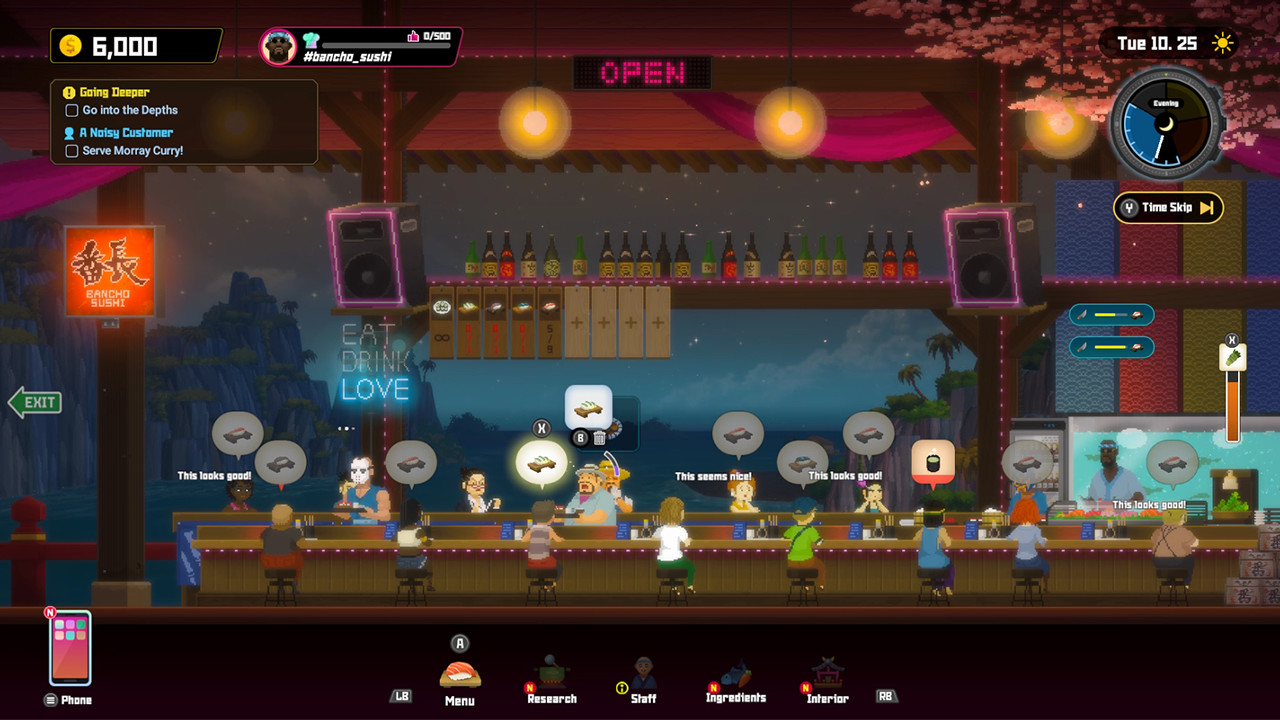
Bancho Sushi looks like a reflex minigame: run plates, pour tea, grind wasabi. The money, though, is decided before service starts, by which recipes you put on the menu and how far you have enhanced them. A level 1 Blue Tang Sushi sells for 6 gold. A level 10 Seagrapes Jellyfish Sushi sells for 832. Everything between those two numbers is planning.
This guide covers that planning: which recipes to sell at each stage of the game and why, how to budget enhancement, what Cooksta ranks actually unlock, how to hire, train and dispatch staff, and how VIPs and seasonal parties fit in. Prices and costs come from the Dave the Diver Wiki's recipe and staff data; balance can change with updates, so treat exact figures as a guide.
A common claim is that seasoning sushi with wasabi or soy sauce doubles its price. That is not how the game works. Wasabi is a kitchen stock that drains as dishes are made and stops all cooking when it runs out. Soy sauce, salt and olive oil are recipe ingredients. Prices rise through recipe enhancement, higher-value recipes and well-poured drinks.
The short answer: what to sell at each stage
The pattern that works all game: one recipe you are enhancing toward level 10, one cheaper recipe you serve at level 5 or so in the meantime, and a switch to better fish as you reach deeper areas. These are the recipes the wiki's strategy guide builds around, with their real prices.
| Stage | Enhance toward max | Serve meanwhile | Price Lv1 → Lv10 |
|---|---|---|---|
| Day 1, shallows | None yet: take both a few levels | Blue Tang and Redtoothed Triggerfish Sushi | 6 → 22 / 9 → 33 |
| Early, down to 130 m | Longnose Sawshark Sushi | Green Humphead Parrotfish, Atlantic Mackerel, Tiger Shark | 35 → 129 / 16 → 59, 21 → 77, 50 → 185 |
| After Vincent's VIP visit | Seagrapes Jellyfish Sushi | Your fish-only recipes | 225 → 832 |
| Depths | Finish Sawshark | Megamouth Shark Sushi | 95 → 351 |
| Glacier Passage | Blobfish Sushi | Vampire Squid Sushi | 120 → 444 / 115 → 425 |
| Mid to late game | Special Fried Shrimp Sushi | Blobfish or Vampire Squid | 380 → 1,406 |
| Hydrothermal Vents | Dunkleosteus Sushi | Anything maxed | 210 → 777 |
Why these and not the many other fish? Three reasons. They are plentiful (you can bring back enough every day to enhance), they are easy to kill or catch with the gear you have at that point, and most of them are not needed for other recipes you will want later. Price tends to follow a fish's weight and grade, so small reef fish are only worth it on the first day.
How dishes are priced
Enhancement is the main lever
Every recipe has a base price, a base taste and a number of dishes (plates) per set of ingredients. Enhancing raises all three:
- Price = base price × (1 + 0.3 × (level − 1)), rounded down. Level 5 = 2.2× base, level 10 = 3.7× base.
- Taste rises by a fixed amount per level. For fish-only sushi it is simply the base taste × level.
- Dishes grow slightly (base dishes × (1 + level/20), rounded down), which only matters for recipes that start at 5 or more plates.
Most recipes cap at level 10; a few cannot be enhanced at all.
Drinks add on top
- Green tea: some customers ask for tea before ordering. A GOOD-or-better pour (close to the line) makes them pay 30% more for the meal.
- Beer: unlocked when Vincent gifts the restaurant a refrigerator after his VIP visit. Aim for about 20% foam; GOOD or better adds revenue.
- Cocktails: a dispenser comes later, from the VIP mission Whose Fried food is the Best?. Staff need a separate cocktail skill for these.
Tips are counted separately and depend on the server's Appeal stat and skills.
Plates per ingredient: the second number to watch
Fish-only sushi gives one plate per fish. Many seasoned recipes give several plates per set, which changes the maths when fish are your bottleneck. At level 1:
| Recipe | Ingredients | Plates | Gold per set |
|---|---|---|---|
| Redtoothed Triggerfish Sushi | 1 Redtoothed Triggerfish | 1 × 9 | 9 |
| Salt-grilled Redtoothed Triggerfish | 2 Redtoothed Triggerfish, 1 Salt | 4 × 48 | 192 |
| Whole-Roasted Shark Head | 1 Whitetip Reefshark Head, 1 Olive Oil | 5 × 75 | 375 |
| Boiled Yellowback Fusilier | 3 Yellowback Fusilier, 1 Soy Sauce | 5 × 50 | 250 |
So the same two triggerfish are worth 18 gold as plain sushi and 192 as the salt-grilled dish (unlocked at Cooksta Bronze, 3 Artisan's Flame to research). The catch: you only earn that if enough customers order those plates tonight, because unsold plates are thrown away at closing.
Planning enhancement
The price gain per level is fixed, but the cost is not. The number of each ingredient needed for the next level is (amount per serving + 1) × 1.5^current level, rounded down. For a recipe that uses one fish:
| Enhance to | Fish needed | Running total | Price vs base |
|---|---|---|---|
| Lv2 | 3 | 3 | 1.3× |
| Lv3 | 4 | 7 | 1.6× |
| Lv4 | 6 | 13 | 1.9× |
| Lv5 | 10 | 23 | 2.2× |
| Lv6 | 15 | 38 | 2.5× |
| Lv7 | 22 | 60 | 2.8× |
| Lv8 | 34 | 94 | 3.1× |
| Lv9 | 51 | 145 | 3.4× |
| Lv10 | 76 | 221 | 3.7× |
A recipe that uses two of an ingredient needs 333 of it to reach level 10, three needs 446.
What this means in practice:
- Levels 2 to 5 are cheap. 23 fish more than doubles the price. Almost any recipe you will serve for more than a few nights is worth taking to level 5.
- Levels 8 to 10 cost 161 fish for the last 0.9×. Only do this for a recipe you will keep serving for a long time, made from something you can farm daily.
- Do not max low-value fish. 221 Blue Tang buys you a 22-gold dish. Push it to level 5 or so on day 1 and move on.
- Enhancement is permanent; the fish are gone. Count on the menu price, not on getting ingredients back.
Seagrapes Jellyfish Sushi: the first big target
Bancho asks for Sea Grape, White Spotted Jellyfish and Salt in the VIP mission Gourmet Vincent's Challenge (after Beyond the Rock Pile). Completing it unlocks Seagrapes Jellyfish Sushi without research, plus 1,000 gold and the beer refrigerator.
At 225 gold base and 832 at level 10, it beats every fish-only recipe you can reach early. The bottleneck is not the jellyfish but Salt: you need 221 of each ingredient to max it, and seasonings come mainly from dispatching staff. That is why the wiki's guide recommends hiring cheap staff early just to dispatch them for Salt, and planting Sea Grapes at the seaweed farm when it becomes available. Avoid spending Sea Grapes and jellyfish on other recipes until this one is done (the Jellyfish Party is the exception worth stocking for).
Special Fried Shrimp Sushi: the second
Training Drae to level 5 unlocks Special Fried Shrimp Sushi (8 Artisan's Flame to research): 2 Black Tiger Shrimp, 2 Whiteleg Shrimp, 1 Rice and 1 Olive Oil, at 380 gold base and 1,406 at level 10. Maxing it takes 221 Olive Oil and 333 of each shrimp, so start dispatching for Olive Oil once your Salt is covered, and catch every shrimp you see. This depends on Drae applying to one of your hiring ads.
Boss dishes: serve them all at once
Recipes made from a boss ingredient can only be served once and give 10 plates. If you need money, put only the boss dish on the menu at the start of the night and add other recipes when it is almost sold out. Some boss dishes count for seasonal parties, so if you are not short of gold you can hold them for those.
Cooksta: what each rank unlocks
Cooksta is the restaurant's social media app. Followers come from serving customers proper menu items; Norimaki gives none. Ranking up is how you get more customers per night, more menu slots, more staff slots and new recipes.
| Rank | Requirements | Main unlocks | Max customers |
|---|---|---|---|
| Coal | — | Starting rank | 10 |
| Bronze | 10 followers | Menu slot, kitchen staff slot, 4 recipes (incl. Salt-grilled Redtoothed Triggerfish) | 15 |
| Silver | 20 followers, 2 researched recipes | Menu slot, serving staff slot, cooking slot, 3 recipes | 21 |
| Gold | 100 followers, 125 best taste, 5 researched recipes | Menu slot, kitchen staff slot, 4 recipes (incl. Seagrapes Special Sushi) | 28 |
| Platinum | 200 followers, 250 best taste, 19 researched recipes | Cooking slot, more wasabi, 4 recipes | 36 |
| Diamond | 720 followers, 375 best taste, 32 researched recipes | More wasabi, 4 recipes, Diamond decorations | 45 |
Two requirements catch players out:
- Best taste is the highest taste of any single dish you have served. Seagrapes Jellyfish Sushi (taste 100, +20 per level) clears Gold's 125 at level 3 and Platinum's 250 at level 9. Diamond's 375 needs a high-taste dish such as Dunkleosteus Sushi at level 9 (378) or Smooth Hammerhead Sushi at level 10 (390).
- Researched recipes cost Artisan's Flame, and you earn at most 5 per night (only when every customer is served a proper dish). Platinum and Diamond need 19 and 32 researched recipes, so research steadily rather than saving everything. When you reach Silver's follower count, researching any cheap recipe completes the rank immediately.
Expenses (staff pay and other running costs) also start once you reach 10 followers, so the jump to Bronze is when the restaurant starts costing money as well as making it.
Staff: hiring, training and dispatch
Hiring unlocks after you serve Yoshie the Whole-Roasted Shark Head in A Scolding from Yoshie. Ads cost 50 (Flyer, up to 2 applicants), 150 (TV, up to 3) or 400 gold (Internet, up to 4); higher ads bring applicants above your Cooksta level. Résumés arrive the next day.
What the stats do
| Stat | Effect |
|---|---|
| Cooking | How fast a cook prepares each dish |
| Serving | Movement speed in the dining area, and speed of extra tasks like drinks |
| Procure | Maximum seasoning brought back from dispatch |
| Appeal | Size and frequency of tips, and the minimum seasoning from dispatch |
Each staff member also has two special skills, unlocked at levels 3 and 7: things like Drink serving, Cleaning, Wasabi refill, Cocktail serving, Tip master, Cooking+ or Dispatch master. Some staff unlock a recipe at level 5, 10 or 15. Always open Details before hiring: it shows max-level stats and both skills, which matter more than the level 1 numbers.
Who to put where
For reference, the wiki's staff tables list Maki with the highest max Cooking (1,055) and El Nino (highest hiring fee in the game), Itsuki and Cohh among the best servers, with Billy as a cheaper serving option. Who applies is random, so treat these as names to grab if they show up, not something to wait for.
Training costs and pay
Training costs are the same for everyone: 150 gold for level 2, 215 for 3, 308 for 4, 442 for 5, 635 for 6, 911 for 7, 1,307 for 8, and about double every two levels after that (16,348 for level 15). Levels 3 and 7 are the natural stopping points because they unlock skills.
Nightly pay grows with level, and every hired staff member is paid, including those in the waiting room or out on dispatch. Staff can be dismissed for a partial refund that depends on who they are and their level.
Dispatch
Staff who are not working can be dispatched for one day to gather a seasoning Dave has already found in cooking pots while diving. This is the steady source of Salt and Olive Oil; Jango sometimes sells them too. Put dispatch staff on whichever seasoning your current enhancement target needs.
VIPs, parties and the branch
VIP missions are scripted visits with a request list. Bancho tells you which ingredients to bring, and you get a few days to gather them. Gourmet Vincent's Challenge (Chapter 1) and Michael Bang's Inspiration (Chapter 3) each pay 1,000 gold and 50 likes; Vincent's unlocks Seagrapes Jellyfish Sushi and beer, Michael Bang's leads to Otto's rice paddy. Later contests (Chinese cuisine, fried food, pasta) have you cook as Bancho in a timed minigame and unlock new recipes. If you miss Vincent's ingredients, he simply reschedules.
Seasonal parties start appearing around October 12 in the game's calendar: Jellyfish, Tuna, Marlin, Shark, Cucumber, Curry, Shrimp and Lobster. Each wants dishes made from that ingredient. A countdown appears a few days ahead, and qualifying recipes are marked with a pink bow tie so you do not spend the ingredients early. If a mission clashes with the party night, the party is postponed rather than lost.
The branch opens later. Its manager's total stats decide how many customers come and the highest ingredient rank it can use, and its staff need drink, cocktail, cleaning and wasabi skills between them. Decorations are shared between both restaurants.
Running service without wasting ingredients
The basics of service (wasabi, dirty tables, Norimaki) are in the Beginner Guide. The one habit that matters most for money: keep exactly one surplus recipe on Auto Supply, and post everything else by hand in the amounts you expect to sell. Auto Supply restocks a recipe when it hits 0 plates, so you never fall back to 1-gold Norimaki, while unsold plates of everything else would be thrown away at closing. Fish you will not serve can be sold from the Ingredients screen; it pays less than a dish, but more than letting them sit.
Common mistakes
- Believing wasabi or soy sauce raises prices. They do not. Enhancement, higher-value recipes and drinks do.
- Maxing a cheap fish. 221 Blue Tang for a 22-gold dish is a poor trade. Level 5, then move on.
- Spreading enhancement across many recipes. Two focused recipes earn more than ten at level 2.
- Using Sea Grapes, jellyfish or Salt on other dishes before Seagrapes Jellyfish Sushi is maxed.
- Buying decorations for revenue. They are cosmetic. Customer count comes from Cooksta rank.
- Hiring a crowd and training everyone. Pay is nightly for every hire. Train the cook and two servers to levels 3 and 7, and keep the rest cheap for dispatch.
- Spending Artisan's Flame randomly. You earn at most 5 a night, and Platinum and Diamond need 19 and 32 researched recipes. Research what you will serve or what a party needs.
- Leaving the menu empty for one rush. Norimaki costs you money, followers and that night's flame.
Related guides
For the day loop, early upgrades and the first hire, start with the Beginner Guide. The fish in the table above get much easier with the right gear from the Diving and Weapons Guide, and the one-time boss dishes come from the fights in the Boss and Creature Guide. If you are still deciding whether the game is for you, read the Honest Review.
★Honest Take: the restaurant is a planning game in disguise
What Bancho Sushi does well is make diving matter. Every fish you bring up has a price, and the enhancement curve gives you a reason to go back for the same fish tomorrow. Once you see that the 1.5× cost curve makes levels 2 to 5 cheap and levels 8 to 10 a commitment, choosing what to farm becomes the most interesting decision of the day. The weak spots are real, though. Staff are random, so the "best" server may never apply. The game explains followers, taste and Artisan's Flame poorly, which is how myths like the wasabi one spread. And late-game Salt and Olive Oil dispatch turns into a long, quiet grind. It is still one of the better management layers attached to an action game, as long as you plan your menu instead of filling it.